
Instagram is such a big social media platform where you can share parts of your life in the form of pictures. For me personally, I like to edit all my pictures in the same way in terms of filters as I feel like my Instagram just looks and flows better this way. For my Instagram, I like my images to look bright and warm so if you would like a similar theme, then here is how I do it.
WHITENING

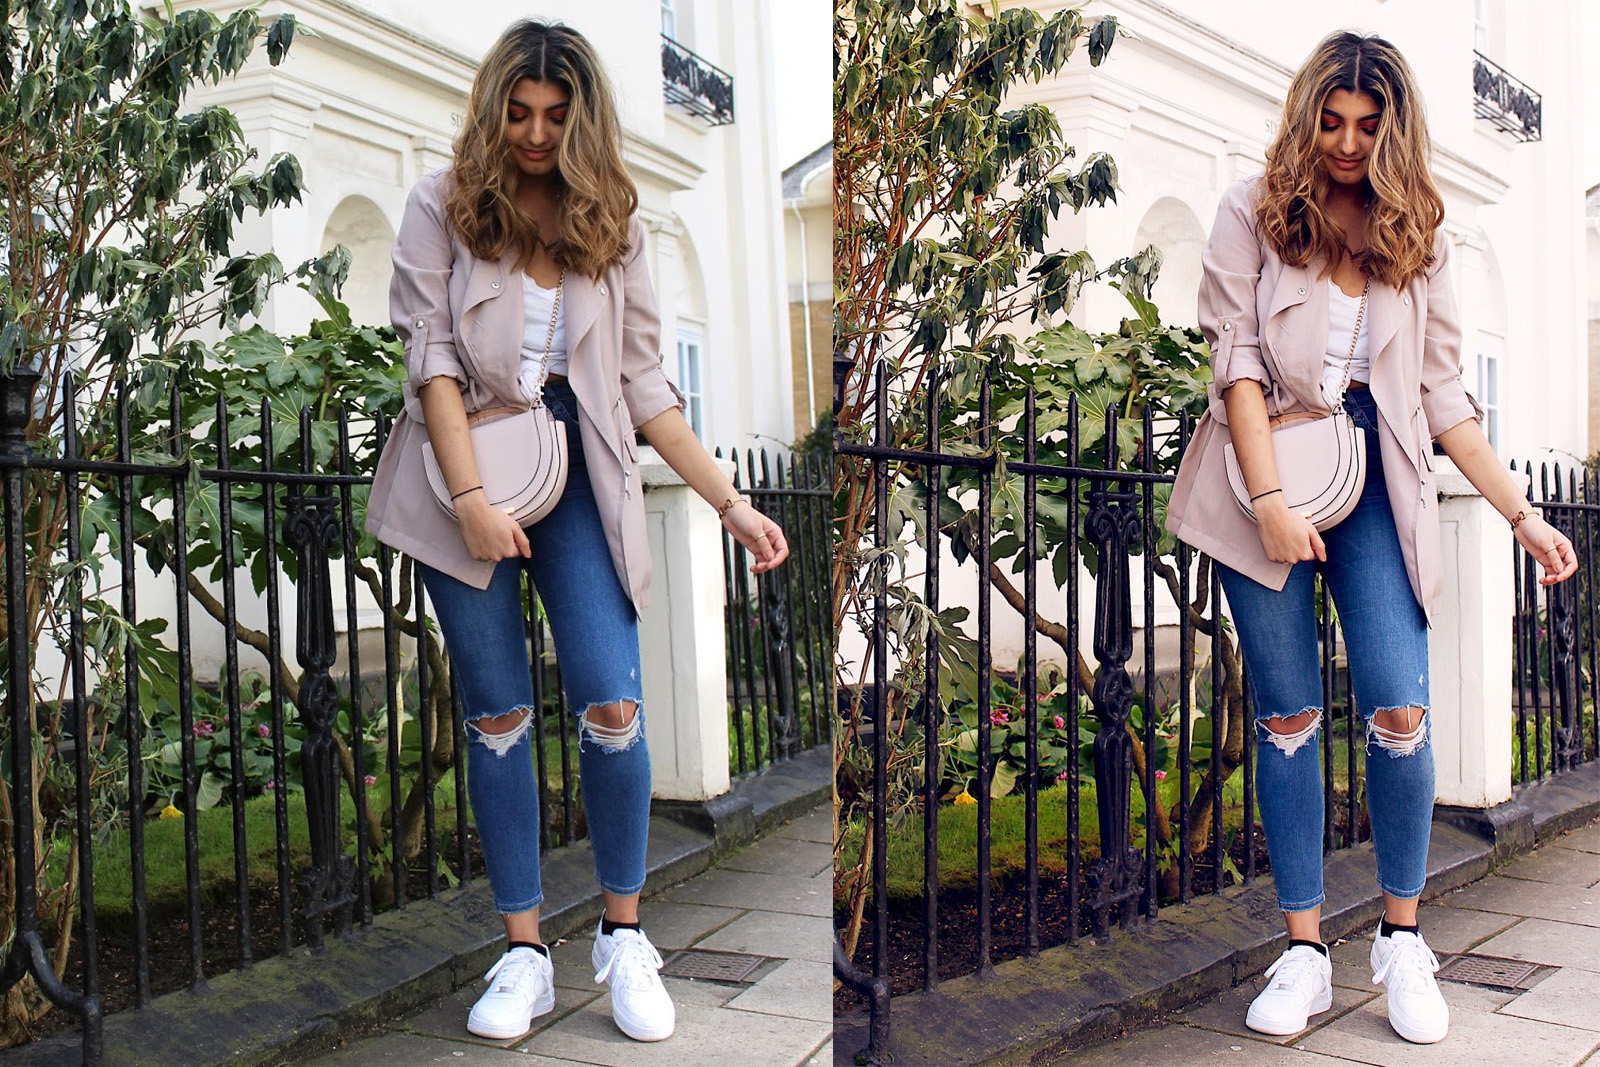
So this first thing I do with all my images is whiten the background and floor. I do this using the FaceTube app and use the feature made to whiten teeth. By whitening the background and other things such as the floor, it makes you stand out more and gives a much cleaner look to the image. As you can see, there is not a drastic change to the image but it is subtle however, this makes a difference in the long run.
FILTER

I then take the image into the next app, the popular VSCO. My new go to filter is A5 and I like to use this filter half way as when it is full, it gives the image a cool, blue effect and I like the warmer effect on my images.
TUNE

Staying in VSCO, I then go onto tuning the image. I only use the highlights, shadows, temperature and tint options.
Highlights + 1.6
Shadows + 1.1
Temperature + 1.4
Tint + 1.9
This app offers a copy and paste feature so once you apply these things on one picture, you can just copy and paste everything onto your next picture.
ENHANCE

Moving onto the next app, I then take the image into Instasize where I like to further enhance. I only use three things on here, Lux (+10), Sharpness (+3) and Warmth (+3). These numbers change depending on the image.
Lux just makes the blacks in the in image blacker and richer, sharpness makes the image that bit clearer and warmth just gives the image an overall warm look.
FINAL TOUCHES

The last step is opening the image into Instagram and playing around with the brightness and contrast. To me these two things really are the finishing touches and the amount depends on the picture as some may need more brightness than others. I then crop the image into a square and upload!
I know looking at all of that may seem a lot for an Instagram post, but honestly it doesn't take that long once you know what you're doing and I actually quite enjoy doing it!


And if you willing to improve your instagram https://zen-promotion.com/ to be the best.
ReplyDelete